Hi everyone,
I'm not going to post a cake this time, I mean not just a cake but a whole dessert table. We've come full circle with this project, as you may know that I started baking and cake decorating when I experimenting with fondant for my daughter's first birthday. I was making cookies-on-a stick back then, fast forward one year I did a whole dessert table for my daughter's second birthday. Here's a picture as a reminder when it all started.
Cookie-on-a stick I did for my daughter's first birthday
And now I present you, BakerzDad's first dessert table, it took months to plan, a week to execute and forever stays in my heart.
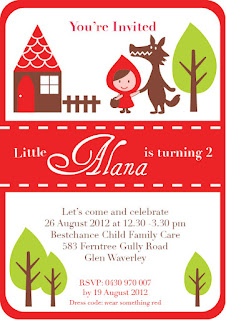
The theme was little red riding hood inspired by some beautiful creation by talented party stylist out there and the fact that red and pink is always my daughter's color. Initially I wanted to do Alice's tea party but at the end I decided to do little red because it's more suited for my daughter. So I went to the internet for some inspiration and I found the cutest rendition of little red by some Japanese lunch box company, so basically the picture that inspired me is taken from lunch boxes hehehehe.
The invite
All of my cake decorating journey I've seen tons of beautiful dessert table and I promise myself one day that I will make my own dessert table. The opportunity came when we decided to throw birthday party for my daughter and I was already planning months in advance especially what I did was trying to build cake stands collection.
I started with the printable, trained as desktop publisher sure came handy when I need to get some graphics done. I'm not the most creative person so what I did was basically using what I have from the invite design and make some printable out of it. This is the part that you need to plan ahead when you want to make sure no last minute rush. I got the printable printed and trimmed weeks before the party so I don't have to worry about it because it's quite time consuming to do.
The printable
For the desserts, I started a week in advance for the cookies as I can store them in airtight container and it won't go stale. The next step is macaroon shell, I tried 1.5 recipe in oppose to single recipe and my macaroons didn't turn out as I wanted but I can't be bothered to redo it. I store the shells in an airtight container and filled it one day before the party.
Cookies
my fat macaroons
I had my mum and dad came from overseas and I got my mum printed labels for apple juice bottles, I love how it turned out.
I did cupcakes and cakepops last once I finished with the cake. The turned out quite well too.
Cupcakes
Cakepops
Let's take a closer look on the dessert table, I bought some lollies and marshmallows for the buffet and it added color to the table.
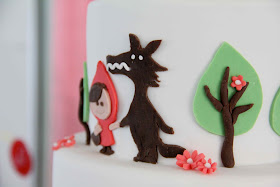
And now we move on to the cake, seeing a lot of dessert tables I can tell that since the table already loaded with sweets you don't need big cake and the design should simple as you already got a colorful table. But I can't resist myself, I've been dying to try on 3 tier cake and what's the best time to do it if not on my daughter's birthday. So BakerzMum and me decided to do 3 tier cake but I compensate with the design as I don't want it over crowded the table. I decided to once again took the graphic from the invite and playing with color.
Bottom layer is chocolate cake with ganache filling and I cover it with red fondant with minimum decoration.
The 2 top tiers are lapis surabaya with cut out fondant mimicking the invitation design.
This is a darn heavy cake but I'm really happy how it turned out and a great experience for me and BakerzMum.
We had a great day, as I finally got to do my first dessert table and everybody had fun at the party probably a little bit sugar overdose.
My little family
Thanks everyone for checking on my blog, hopefully I got to do project like this more often. Here's a sneak peek on photo session of the cake done with portable studio tent. I will update you with my next project.


I loved how you pulled everything together. Very creative although you do not give yourself enough credit in that area. I'm intrigued, I hope you don't mind telling me what is your lighting setup consist of. I'm still trying to get a proper one for my cakes
ReplyDeleteHi Della, thanks for your compliment. I bought the lighting as a set from Avedia.com.au but you can find any soft tent cube set from ebay. They're quite affordable and really helps to capture the true colour of the cakes. and really helpful when you have limited natural light, hope this helps.
DeleteHi, where did you buy the printable?
ReplyDeleteHi there, if you still check this, could you please let me know where you bought this printable from?
ReplyDelete